Remote upgrade
Currently, the system does not have an interface for direct remote upgrade.
But we can understand the TF card detection and upgrade mechanism, and then add some of our own code to achieve the purpose of remote upgrade.
We first introduce the general upgrade process of inserting a TF card.
TF card detection upgrade process
When the system is started or the TF card is inserted, if TF card is mounted normally, The system will check whether there is an update.img file in the TF card root directory (in the system, the TF card root directory is mapped to /mnt/extsd).
If it exists, further verify whether the file meets the requirements. If it passes the verification, an upgrade prompt interface will pop up, and the user can choose to upgrade.
If it does not exist, the detection process ends and there is no action on the interface.
Implementation steps
- First we have to download the upgrade image
update.img.
Under normal circumstances, downloading files through the HTTP protocol is the easiest way, of course, you can also choose other protocols according to the actual situation.
After downloading, save the image file to the TF card directory/mnt/extsd/.[!Note] If there is no TF card inserted in the machine, this directory can still be written because it is stored in the memory. Limited by the memory size, if the image file is too large, it will cause abnormal device operation or upgrade failure.
If you have inserted a TF card, you can ignore the memory size problem. Call upgrade detection function
First download the UpgradeMonitor.h source file and save it to thejni/include/osdirectory of the project.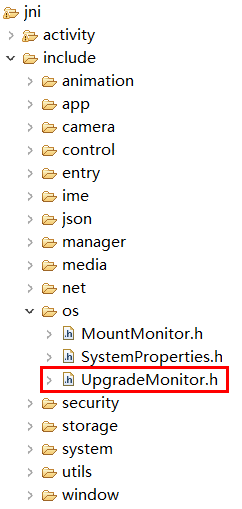
Then call the interface to detect the upgrade.
#include "os/UpgradeMonitor.h"//Actively detect whether there is a correct update.img file in the /mnt/extsd directory, //If yes, an upgrade prompt box will pop up, //If not, nothing happens UpgradeMonitor::getInstance()->checkUpgradeFile("/mnt/extsd");After the upgrade prompt interface pops up, the user can choose whether to upgrade.
So far, the remote upgrade function has been fully realized.
Automatically update after downloading the file
If you want to force the update after downloading the upgrade file, you only need to refer to the Auto Upgrade document and create the zkautoupgrade file with the code.
Avoid repeated upgrades
In the above steps, we save the image file in the /mnt/extsd/ directory. After a successful upgrade, the machine will automatically restart.
At this time, the system will perform the regular upgrade detection process. Due to the existence of the image file, the upgrade prompt interface pops up again, resulting in repeated upgrades.
Solution
When downloading the image file, save it to a directory other than /mnt/extsd/, for example: /mnt/extsd/temp/,
In addition, the parameters of the call detection function are also modified synchronously.
UpgradeMonitor::getInstance()->checkUpgradeFile("/mnt/extsd/temp");
Sample reference
Complete sample download
The sample simply implements the http client to download files, refer to the http part of the source code.
Downloading files is a time-consuming operation, it is recommended to put them in a separate thread, so as not to affect the immediate response of the interface.

Key code
  class DownloadThread : public Thread {
      protected:
      virtual bool threadLoop(){
          http::HttpClient http;
          mTextview1Ptr->setText("download the upgrade file");
          //Create a save path for the upgrade file
          system("mkdir /mnt/extsd/temp");
          //Modify here to the real service IP
          string err = http.Download("192.168.1.1/update.img", 80, "/mnt/extsd/temp/update.img");
          mTextview1Ptr->setText(err);
          if (err.empty()) {
              UpgradeMonitor::getInstance()->checkUpgradeFile("/mnt/extsd/temp");
          }
          mButton1Ptr->setInvalid(false);
          return false;
      };
  };
Server implementation
For the convenience of testing, the example includes ahttp.exe, which is a static file service.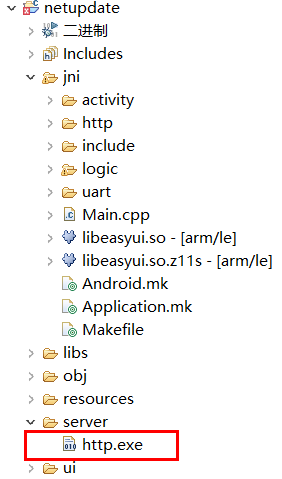
Put the made upgrade image file
update.imgandhttp.exein the same folder, then double-click on the computer to executehttp.exe, as long as the network is normal, you can download the file in the same directory through the website Mirror file.
E.g:
http://192.168.1.1/update.img
(Please pay attention to modify the IP address to the current IP of the computer)
After the server is started, run the sample code to test the remote upgrade.